
Saturday, November 21, 2009
Wednesday, November 18, 2009
Allow OVPI to send emails through Exchange 2007
Remember one thing that there is two tasks you should do
1- create Receive Connector to accept OVPI connection
2-PowerShell Command to assign Permission for anonymous to relay from OVPI
To troubleshoot this Create dummy schedule and run the reports inside and you can open %dpipe_home%\log\piweb.log
If you got Unable to relay

To use the Exchange Management Console to create a new Receive connector that grants the relay permission to anonymous connections
-
Open the Exchange Management Console. Perform one of the following steps:
- To create a Receive connector on a computer that has the Edge Transport server role installed, select Edge Transport, and then in the work pane, click the Receive Connectors tab.
- To create a Receive connector on a Hub Transport server role, in the console tree, expand Server Configuration, and select Hub Transport. In the result pane, select the server on which you want to create the connector, and then click the Receive Connectors tab.
-
In the action pane, click New Receive Connector. The New SMTP Receive Connector wizard starts.
-
On the Introduction page, follow these steps:
- In the Name: field, type a meaningful name for this connector. This name is used to identify the connector.
- In the Select the intended use for this connector: field, select Custom.
- Click Next.
-
On the Local network settings page, follow these steps:
- Select the existing All Available entry, and then click
.gif) .
. - Click Add. In the Add Receive Connector Binding dialog box, select Specify an IP address. Type an IP address that is assigned to a network adapter on the local server that is best able to communicate with the remote messaging server.
Note: In simple exchange implementation, you can leave it as default.
- On the Local network settings page, in the Port field, type 25, and then click OK.
- Click Next.
-
On the Remote Network settings page, follow these steps:
- Select the existing 0.0.0.0 - 255.255.255.255 entry, and then click .
- Click Add or the drop-down arrow located next to Add and type the IP address or IP address range for the remote messaging server or servers that are allowed to relay mail on this server. When you are finished entering the IP addresses, click OK.
- Click Next.
- Select the existing 0.0.0.0 - 255.255.255.255 entry, and then click
-
On the New Connector page, review the configuration summary for the connector. If you want to modify the settings, click Back. To create the Receive connector by using the settings in the configuration summary, click New.
-
On the Completion page, click Finish.
In the work pane, select the Receive connector that you created.
-
Under the name of the Receive connector in the action pane, click Properties to open the Properties page.
-
Click the Permission Groups tab. Select Anonymous users.
-
Click OK to save your changes and exit the Properties page
Open the Exchange Management Shell.
-
Run the following command using the name of the Receive connector that you created in steps 1 through 11:
Get-ReceiveConnector "Receive Connector Name" | Add-ADPermission -User "NT AUTHORITY\ANONYMOUS LOGON" -ExtendedRights "Ms-Exch-SMTP-Accept-Any-Recipient"


to list the Receive Connector Name you can type Get-ReceiveConnector
Tuesday, November 10, 2009
Load MIB file in NNMi
to load mib file in NNMi
change to OV_bin dir
/opt/OV/bin
nnmincidentcfg.ovpl –u username –p password –loadMib <mib file location>
nnmloadmib.ovpl –u system –p password -resynch

Saturday, November 7, 2009
find text in the result of command
Some times when we execute commands we got lot of data that we do not want so if you want to search a result on command, you can pipe your command to find command like the below
cmd /c "net start | %SystemRoot%\system32\find /i "Reporter Service"
Saturday, October 3, 2009
How to install SiteScope 10 License
- Stop Sitescope service
- Look for the following lines and check their values in master.config located in <sitescope dir>\groups (in Sitescope 10 they should be correct):
- _doWorkWithConfigFilePersistency_current=true
- _doWorkWithConfigFilePersistency_next=CHECKED
- Change "_license", "_licenseOld" and "_licenseForX" values in master.config using a new valid license key.
- Open <sitescope dir>\bin\PersistencyViewer.bat, select persistency folder under sitescope directory and then click open.
- Select in the "Filter by type" "com.mercury.sitescope.platform.configmanager.MasterConfig" and double click on "__masterConfig"

- Change "_license", "_licenseOld" and "_licenseForX" using same value used before, then click commit.
- Select in the "Filter by type" "com.mercury.sitescope.platform.configmanager.preferences.PreferencesConfig" and double click on "GeneralDefaultPreferences_"
- Change "_license", "_licenseOld" and "_licenseForX" using same value used before, then click commit.
- Start Sitescope service.
Sunday, September 20, 2009
Happy Feast - Eid Mobarak
الله اكبر الله أكبر الله أكبر لا إله إلا الله الله أكبر ألله أكبر و لله الحمد
Wednesday, August 26, 2009
Integration between Sitescope and OMW
To ensure that the service hierarchy is populated to OMW you have to apply server patch OMW_00016; this patch has been superseded by OMW_00048 and available in http://support.openview.hp.com/selfsolve/document/KM753892?searchIdentifier=d818bd7%3a1235068c088%3a-6e2&resultType=document&documentURL=KM753892&resultsURL=%2fselfsolve%2fpatches&allowReturn=true
The official steps are:
Following are the steps used to solve this particular (SiteScope) problem:
1. Uninstall SiteScope Discovery policy from the node
2. ovc -stop agtrep
3. Delete all files in directory: C:/Documents and Settings/All Users/Application Data/HP/HP BTO Software/tmp/agtrep/
4. ovc -start agtrep
5. install the server patch OMW_00016 on your OMW server system.
6. Then in order for the SiteScope Discovery policy to be corrected, the policy must be opened up, modified, saved, and redeployed.
In order to modify the policy, just change the schedule time of the policy.
What I have done is:
On the OMW server I installed the OMW_00048 Patch
on The Sitescope machine
1. ovc -stop agtrep
2. Delete all files in directory: C:/Documents and Settings/All Users/Application Data/HP/HP BTO Software/tmp/agtrep/
3. ovc -start agtrep
once the service is started the temp directory will be populated by the services xml file

4. then I ran the command ovagtrep –publish

Once it finished the Service hierarchy in OMW is populated

Thursday, August 13, 2009
HP Operations Agent Source location
I was just trying to highlight the locations of the action on the Management server
if you have HP Operations for Unix, you will find the Agent source files in this location
/<OvDataDir>/share/databases/OpC/mgd_node/vendor/<vendor>/<newarch>/<ostype>/<HPOM_version>/RPC_BBC/
where <OvDataDir> is /var/opt/OV
and where <vendor>/<newarch>/<ostype> is, for example:
hp/pa-risc/hpux1100
hp/ia64-32/hpux1122
hp/alpha/tru64
ms/x86/winnt
linux/x86/linux24
linux/x86/linux26
ibm/rs6000/aix5
sun/sparc/solaris7
sun/x86/solaris10
where <HPOM_version> is, for example, A.08.10.xx
If you are using HP Operations for Windows
%OvShareDir%\Packages\HTTPS\windows\ms\5.0 5.1 5.2 6.0\x86\Operations-agent\08.53.007\32 64\https
Tips: Find file in Unix Based Systems
search for a files in Unix environment I always use find command
To search for files with their names in certain directory you have to type find then the path then use -name parameters then type the name and it will search all the files that begin with that name
$ find / –name abc
you can use it to search for core files
$find / –name core
You can also search by file size
$find / –size 100m
Friday, July 31, 2009
Step-By-Step Example Deployment of the PKI Certificates Required for Configuration Manager Native Mode: Windows Server 2008 Certification Authority
This is Microsoft Technet article I just added some pictures.
Updated: February 1, 2009
This step-by-step example deployment, which uses a Windows Server 2008 certification authority (CA), contains procedures that guide you through the process of creating and deploying the public key infrastructure (PKI) certificates that Configuration Manager 2007 requires to operate in native mode. Native mode offers the highest level of security for a Configuration Manager 2007 site, and it is a requirement for Internet-based client management. For more information about native mode in Configuration Manager, see Benefits of Using Native Mode.
The procedures in this example refer to a Microsoft PKI solution, using an enterprise certification authority (CA) and certificate templates. The steps are appropriate for a test network only, as a proof of concept.
Because there is no single method of deployment for the required certificates, you will need to consult your particular PKI deployment documentation for the necessary procedures and best practices to deploy the required certificates for a production environment. For more information about the possible deployment methods, see Deploying the PKI Certificates Required for Native Mode.
|
|
| The use of a Microsoft PKI solution is recommended to support Configuration Manager 2007, but it is not required. Configuration Manager 2007 uses standard PKI certificates, supporting version 3 of the x.509 certificate format. If your existing PKI deployment can create, deploy, and manage the certificates that Configuration Manager 2007 requires for native mode, you can use your existing PKI infrastructure. Consult your PKI documentation for deployment details. |
In This Section
This example contains the following sections, which cover creating and deploying the basic certificates that are required for a Configuration Manager 2007 site to operate in native mode for intranet connectivity:
Deploying the Site Server Signing Certificate
Deploying the Web Server Certificate
Deploying the Client Certificate
Test Network Requirements
The example has the following requirements:
- The test network is running Active Directory Domain Services with Windows Server 2008, and it is installed as a single domain, single forest.
- You have a domain controller running Windows Server 2008 Enterprise Edition, which has installed on it the Active Directory Certificate Services role, and it is configured as an enterprise root certification authority (CA).
- You have one computer that has Windows Server 2008 (Standard Edition or Enterprise Edition) installed on it and that is designated as a member server, and you have Internet Information Services (IIS) installed on it.
- You have one Windows Vista client with the latest service pack installed, and this computer is configured with a computer name that comprises ASCII characters and is joined to the domain.
- You can log in with a root domain administrator account or an enterprise domain administrator account and use this account for all procedures in this example deployment.
Overview
PKI certificates must be installed prior to configuring Configuration Manager 2007 to operate in native mode. This example does not include installing and configuring Configuration Manager 2007, but it provides the steps to provision computers with the certificates they require to operate in Configuration Manager 2007 native mode.
The following table lists the three types of PKI certificates that are required and describes how they are used in a native mode Configuration Manager 2007 site:
| Certificate Requirement | Certificate Description |
| Site server signing certificate | This certificate is installed on the server that will be the Configuration Manager 2007 site server. It is used to sign client policies. |
| Web server certificate | This certificate is installed on servers that will be Configuration Manager 2007 site systems, with roles such as the management point and distribution point. It is used to encrypt data and authenticate the server to clients. |
| Client certificate | This certificate is installed on computers that will be Configuration Manager 2007 clients, and it is installed on the management point. It is used to authenticate the client to site systems; on the management point it is used to monitor the server's operational status. |
For more information about the certificates, see Certificate Requirements for Native Mode.
Follow the steps in this example to achieve the following goals:
- Provision the member server with a Configuration Manager 2007 site server signing certificate so that it can operate as a Configuration Manager 2007 site server in native mode.
- Provision the member server with a Web server certificate so that it can operate as a Configuration Manager 2007 site system server in native mode that can run any of these Configuration Manager site system roles: management point, distribution point, software update point, and state migration point.
- Provision a workstation and the member server with a client certificate so that the workstation can operate as a Configuration Manager 2007 native mode client, and so that the management point can report its status to the site server.
Deploying the Site Server Signing Certificate
This step has four procedures:
- Creating and Issuing the Site Server Signing Certificate Template on the Certification Authority
- Requesting the Site Server Signing Certificate for the Server That Will Run the Configuration Manager 2007 Site Server
- Approving the Site Server Signing Certificate on the Certification Authority
- Installing the Site Server Signing Certificate on the Server That Will Run the Configuration Manager 2007 Site Server
Creating and Issuing the Site Server Signing Certificate Template on the Certification Authority
To create and issue the site server signing certificate template
1. On the domain controller running the Windows Server 2008 console, click Start, click Programs, click Administrative Tools, and then click Certification Authority.
2. Expand the name of your certification authority (CA), and then click Certificate Templates.
3. Right-click Certificate Templates, and then click Manage to load the Certificates Templates Console.
4. In the results pane, right-click the entry that displays Computer in the Template Display Name column, and then click Duplicate Template.

5. In the Duplicate Template dialog box, ensure that Windows 2003 Server, Enterprise Edition is selected, and then click OK.
|
|
| Do not select Windows 2008 Server, Enterprise Edition. |
6. In the Properties of New Template dialog box, on the General tab, enter a template name for the site server signing certificate template, such as ConfigMgr Site Server Signing Certificate.
7. Click the Issuance Requirements tab, and then select CA certificate manager approval.
8. Click the Subject Name tab, and then click Supply in the request.
9. Click the Extensions tab, make sure Application Policies is selected, and then click Edit.
10. In the Edit Application Policies Extension dialog box, select Client Authentication, press Shift and select Server Authentication, and then click Remove.
11. In the Edit Application Policies Extension dialog box, click Add.
12. In the Add Application Policy dialog box, select Document Signing as the only application policy, and then click OK.

13. In the Properties of New Template dialog box, you should now see listed as the description of Application policies: Document Signing.
14. Click OK, click OK to close the Properties of New Template, and then close the Certificate Templates Console.
15. In the Certification Authority console, right-click Certificate Templates, click New, and then click Certificate Template to Issue.
16. In the Enable Certificate Templates dialog box, select the new template you have just created, ConfigMgr Site Server Signing Certificate, and then click OK.
|
|
| If you cannot complete steps 15 or 16, check that you are using the Enterprise Edition of Windows Server 2008. Although you can configure certificate templates with Windows Server Standard Edition and Active Directory Certificate Services, you cannot deploy certificates using modified certificate templates unless you are using the Enterprise Edition of Windows Server 2008. |
17. Do not close the Certification Authority console.
Requesting the Site Server Signing Certificate for the Server That Will Run the Configuration Manager 2007 Site Server
To request the site server signing certificate
1. On the member server, create a folder to contain your certificate files.
2. Open Notepad, or a similar text file of your choice. Copy and paste the following text into the file:
Copy Code
[NewRequest]
Subject = "CN=The site code of this site server is <site-code>"
MachineKeySet = True
[RequestAttributes]
CertificateTemplate = ConfigMgrSiteServerSigningCertificate
3. Replace the text <site-code> with your own site code. For example, if your site code is A01, the line will become: Subject = "CN=The site code of this site server is A01".

|
|
| Both the site code and the name of the template are case sensitive. Make sure that you specify the site code exactly as it appears in the Configuration Manager console, and that you specify the site server signing certificate template exactly as it appears as the Template name (not the Template display name) in the certificate template properties. |
4. Save the file with the name sitesigning.inf, and save it in the certificates folder that you created.
5. Open a command window in the certificates folder that you created, type the following command, and then press Enter:
certreq –new sitesigning.inf sitesigning.req
6. Type the following command, and then press Enter:
certreq –submit sitesigning.req sitesigning.cer
7. You are prompted to select the issuing CA in the Select Certification Authority dialog box. Select the CA, and then click OK. When the certificate is issued, you see RequestId: <number> displayed, where <number> is the next sequential certificate request to the issuing CA. Make a note of this number.
8. Do not close the command prompt.
Approving the Site Server Signing Certificate on the Certification Authority
To approve the site server signing certificate
1. On the domain controller, in Certification Authority, click Pending Requests.
2. In the results pane, you will see the requested certificate with the Request ID that was displayed with the last Certreq command.
3. Right-click the requested certificate, click All Tasks, and then click Issue.

4. Do not close the Certification Authority console.
Installing the Site Server Signing Certificate on the Server That Will Run the Configuration Manager 2007 Site Server
To retrieve and install the site server signing certificate
1. On the member server, in the command window, type the following command, and then press Enter:
certreq –retrieve <number> sitesigning.cer
For example, if the request number previously displayed was 12, type: certreq –retrieve 12 sitesigning.cer
2. You are prompted to select the issuing CA in the Select Certification Authority dialog box. Select the CA, and then click OK. Click OK to overwrite the existing file.
3. Type the following command, and then press Enter:
certreq –accept sitesigning.cer

The member server is now provisioned with a Configuration Manager 2007 site server signing certificate.
Deploying the Web Server Certificate
This step has four procedures:
- Creating a Windows Security Group for the Site System Servers
- Creating and Issuing the Web Server Certificate Template on the Certification Authority
- Requesting the Web Server Certificate
- Configuring IIS to Use the Web Server Certificate
Creating a Windows Security Group for the Site System Servers (Management Point, Distribution Point, Software Update Point, State Migration Point)
To create a Windows security group for the site system server
1. On the domain controller, click Start, click Administrative Tools, and then click Active Directory Users and Computers.
2. Right-click the domain, click New, and then click Group.
3. In the New Object – Group dialog box, enter ConfigMgr IIS Servers as the Group name, and then click OK.
4. In Directory Users and Computers, right-click the group you have just created, and then click Properties.
5. Click the Members tab, and then click Add to select the member server.
|
|
| In our test environment, there is only one server to add. However, in a production environment, it is likely that various servers will host the Configuration Manager 2007 site systems that require certificates, such as the site's management point and distribution points. It is therefore good practice to assign permissions to a group and add the site systems that require the same type of certificate. Creating a security group for these servers enables you to assign permissions so that only these servers can use these certificates. |
6. Click OK, and then click OK again to close the group properties dialog box.
7. Restart your member server (if running) so that it can pick up the new group membership.
Creating and Issuing the Web Server Certificate Template on the Certification Authority
To create and issue the Web server certificate template on the certification authority
1. On the domain controller, while still running the Certification Authority console, right-click Certificate Templates and click Manage to load the Certificate Templates console.
2. In the results pane, right-click the entry that displays Web Server in the column Template Display Name, and then click Duplicate Template.
3. In the Duplicate Template dialog box, ensure that Windows 2003 Server, Enterprise Edition is selected, and then click OK.
|
|
| Do not select Windows 2008 Server, Enterprise Edition. |
4. In the Properties of New Template dialog box, on the General tab, enter a template name to generate the Web certificates that will be used on Configuration Manager site systems, such as ConfigMgr Web Server Certificate.
5. Click the Subject Name tab, click Build from this Active Directory information is selected, and then select one of the following for the Subject name format:
· Common name: Select this option if you will use fully qualified domain names for site systems in Configuration Manager (required for Internet-based client management, and recommended for clients on the intranet).
· Fully distinguished name: Select this option if you will not use fully qualified domain names in Configuration Manager.
6. Clear the option User principal name (UPN).
7. Click the Security tab, and remove the Enroll permission from the security groups Domain Admins and Enterprise Admins.
8. Click Add, enter ConfigMgr IIS Servers in the text box, and then click OK.
9. Select the Enroll permission for this group, and do not clear the Read permission.
10. Click OK, and close the Certificate Templates Console.
11. In the Certification Authority console, right-click Certificate Templates, click New, and then click Certificate Template to Issue.
12. In the Enable Certificate Templates dialog box, select the new template you have just created, ConfigMgr Web Server Certificate, and then click OK.
13. Do not close the Certification Authority console.
Requesting the Web Server Certificate
To request the Web server certificate
1. Restart the member server to ensure it can access the certificate template with the configured permission.
2. Click Start, click Run, and type mmc.exe. In the empty console, click File, and then click Add/Remove Snap-in.
3. In the Add or Remove Snap-ins dialog box, select Certificates from the list of Available snap-ins, and then click Add.
4. In the Certificate snap-in dialog box, select Computer account, and then click Next.
5. In the Select Computer dialog box, ensure Local computer: (the computer this console is running on) is selected, and then click Finish.
6. In the Add or Remove Snap-ins dialog box, click OK.
7. In the console, expand Certificates (Local Computer), and then click Personal.
8. Right-click Certificates, click All Tasks, and then click Request New Certificate.
9. On the Before You Begin page, click Next.
10. On the Request Certificates page, select ConfigMgr Web Server Certificate from the list of displayed certificates, and then click Enroll.
11. On the Certificates Installation Results page, wait until the certificate is installed, and then click Finish.
12. Close Certificates (Local Computer).
Configuring IIS to Use the Web Server Certificate
To configure IIS to use the Web server certificate
1. On the member server, click Start, click Programs, click Administrative Tools, and then click Internet Information Services (IIS) Manager.
2. Expand Sites, right-click Default Web Site, and then select Edit Bindings.
3. Click the https entry, and then click Edit.
4. In the Edit Site Binding dialog box, select the certificate that you requested by using the ConfigMgr Web Server Certificates template, and then click OK.
|
|
| If you are not sure which is the correct certificate, select one, and then click View. This allows you to compare the selected certificate details with the certificates that are displayed with the Certificates snap-in. For example, the Certificates snap-in displays the certificate template that was used to request the certificate. You can then compare the certificate thumbprint of the certificate that was requested with the ConfigMgr Web Server Certificates template with the certificate thumbprint of the certificate currently selected in the Edit Site Binding dialog box. |
5. Click OK in the Edit Site Binding dialog box, and then click Close.
6. Close Internet Information Services (IIS) Manager.
The member server is now provisioned with a Configuration Manager 2007 Web server certificate.
|
|
| If this server will be configured for software updates, there is additional IIS configuration that must be performed after WSUS is installed. For more information, see How to Configure the WSUS Web Site to Use SSL. |
Deploying the Client Certificate
This step has three procedures:
- Creating and Issuing the Workstation Authentication Certificate Template on the Certification Authority
- Configuring Autoenrollment of the Workstation Authentication Template Using Group Policy
- Automatically Enrolling the Workstation Authentication Certificate and Verifying Its Installation on Computers
Creating and Issuing the Workstation Authentication Certificate Template on the Certification Authority
To create and issue the Workstation Authentication certificate template on the certification authority
1. On the domain controller, while still running the Certification Authority console, right-click Certificate Templates, and then click Manage to load the Certificate Templates management console.
2. In the results pane, right-click the entry that displays Workstation Authentication in the column Template Display Name, and then click Duplicate Template.
3. In the Duplicate Template dialog box, ensure that Windows 2003 Server, Enterprise Edition is selected, and then click OK.
|
|
| Do not select Windows 2008 Server, Enterprise Edition. |
4. In the Properties of New Template dialog box, on the General tab, enter a template name to generate the client certificates that will be used on Configuration Manager client computers, such as ConfigMgr Client Certificate.
5. Click the Security tab, select the Domain Computers group, and select the additional permissions of Read and Autoenroll. Do not clear Enroll.
6. Click OK and close Certificate Templates Console.
7. In the Certification Authority console, right-click Certificate Templates, click New, and then click Certificate Template to Issue.
8. In the Enable Certificate Templates dialog box, select the new template you have just created, ConfigMgr Client Certificate, and then click OK.
9. Close the Certification Authority console.
Configuring Autoenrollment of the Workstation Authentication Template Using Group Policy
To configure autoenrollment of the workstation authentication template using Group Policy
1. On the domain controller, click Start, click Administrative Tools, and then click Group Policy Management.
2. Navigate to your domain, right-click the domain, and then select Create a GPO in this domain, and Link it here.
|
|
| This step uses the best practice of creating a new Group Policy for custom settings rather than editing the Default Domain Policy that is installed with Active Directory Domain Services. By assigning this Group Policy at the domain level, you will apply it to all computers in the domain. However, on a production environment, you can restrict the autoenrollment so that it enrolls on only selected computers by assigning the Group Policy at an organizational unit level, or you can filter the domain Group Policy with a security group so that it applies only to the computers in the group. If you restrict autoenrollment, remember to include the server that is configured as the management point. |
3. In the New GPO dialog box, enter a name for the new Group Policy, such as Autoenroll Certificates, and click OK.
4. In the results pane, on the Linked Group Policy Objects tab, right-click the new Group Policy, and then click Edit.
5. In the Group Policy Management Editor, expand Policies under Computer Configuration, and then navigate to Windows Settings / Security Settings / Public Key Policies.
6. Right-click the object type named Certificate Services Client – Auto-enrollment, and then click Properties.
7. From the Configuration Model drop-down list, select Enabled, select Renew expired certificates, update pending certificates, and remove revoked certificates, select Update certificates that use certificate templates, and then click OK.
8. Close Group Policy Management.
Automatically Enrolling the Workstation Authentication Certificate and Verifying Its Installation on Computers
To automatically enroll the workstation authentication certificate and verify its installation on the client computer
1. Restart the workstation computer, and wait a few minutes before logging on.
|
|
| Restarting a computer is the most reliable method of ensuring success with certificate autoenrollment. |
2. Log on with an account that has administrative privileges.
3. In the search box, type mmc.exe., and then press Enter.
4. In the empty management console, click File, and then click Add/Remove Snap-in.
5. In the Add or Remove Snap-ins dialog box, select Certificates from the list of Available snap-ins, and then click Add.
6. In the Certificate snap-in dialog box, select Computer account, and then click Next.
7. In the Select Computer dialog box, ensure that Local computer: (the computer this console is running on) is selected, and then click Finish.
8. In the Add or Remove Snap-ins dialog box, click OK.
9. In the console, expand Certificates (Local Computer), expand Personal, and then click Certificates.
10. In the results pane, confirm that a certificate is displayed that has Client Authentication displayed in the Intended Purpose column, and that ConfigMgr Client Certificate is displayed in the Certificate Template column.
11. Close Certificates (Local Computer).
12. Repeat steps 1 through 11 for the member server to verify that the server that will be configured as the management point also has a client certificate.
The workstation and member server are now provisioned with a Configuration Manager 2007 client certificate.
Thursday, July 30, 2009
Merge 2GB VMDK files to one single VMDK file
sometimes when we create Virtual machine inside vmware application we might select create the split virtual disk to multiple files in 2 GB files, this is to enhance the copying process and mainly for storing the VM in File systems that does not support creating larger files.

If we need to convert it back to be a single file; there is a tool called vmware-vdiskmanager.exe can be used to manipulate virtual disk, this tool can be used to convert theses file to be single file by using the below command.
vmware-vdiskmanager.exe –r thefirstfile.vmdk –t 0 singlefile.vmdk
- Source file thefirstfile.vmdk is the selected in the image below

screenshot of the command:

Wednesday, July 29, 2009
TIPS: xnmevents “NNM Alarm Browser” hangs on startup
When you open NNM 7.x Native interface ovw it opens automatically another window is called alarm browser where you can see all the received traps plus system events grenerated by NNM Components.
this window might hang because dirty shutdown the its database “Events database. to ensure that this is the case you can run ovdumpevents command which will dump the events to your display in ASCII format and it will display message like the highlghted below, if it can not parse it
/var/opt/OV/share/databases/eventdb# ovdumpevents
.1.0.50790415 333965
1247535448 1 Tue Jul 14 05:37:28 2009 computername - Pattern Delete: Event type .1.3.6.1.4.1.11.2.17.1.0.58916867 0 false 3 335241 0 false source:computername(correlate to e2aa977e-7016-71de-0e4b-949781b50000) by ECS;1 17.1.0.58916883 0
1247535450 1 Tue Jul 14 05:37:30 2009 computername - Incorrect Community Name (authenticationFailure Trap) enterprise:ENTERPRISES.311.1.1.3.1.2 (.1.3.6.1.4.1.311.1.1.3.1.2) args(0):;2 .1.3.6.1.6.3.1.1.5.5.1.3.6.1.4.1.311.1.1.3.1.2 0
1247535452 1 Tue Jul 14 05:37:32 2009 computername - Incorrect Community Name (authenticationFailure Trap) enterprise:ENTERPRISES.311.1.1.3.1.2 (.1.3.6.1.4.1.311.1.1.3.1.2) args(0):;2 .1.3.6.1.6.3.1.1.5.5.1.3.6.1.4.1.311.1.1.3.1.2 0
T ovtrapd disconnected from pmd;1 17.1.0.59179057 0
Unable to read events from the OV Event Database: Read a corrupted record from the OV Event Log: ()
In this case we can remove the current log file and this can be done by the following.
change the directory to the Event database directory
cd /var/opt/OV/share/databases/eventdb
rename the statelog file to be statelog.anything
/var/opt/OV/share/databases/eventdb# mv statelog statelog.corrupted
Restart the ovalarmsrv
/var/opt/OV/share/databases/eventdb# ovstop ovalarmsrv
/var/opt/OV/share/databases/eventdb# ovstart ovalarmsrv
try to start the nnm again or just the Alarm Browsers by running xnmevents.
| /var/opt/OV/share/databases/eventdb# xnmevents |
If the problem still exists it may be the whole database is corrupted so you may remove all the files in the /var/opt/OV/share/databases/eventdb then restart the ovalarm service and hopefully “Insha’ Allah” it will work :) .
Monday, July 27, 2009
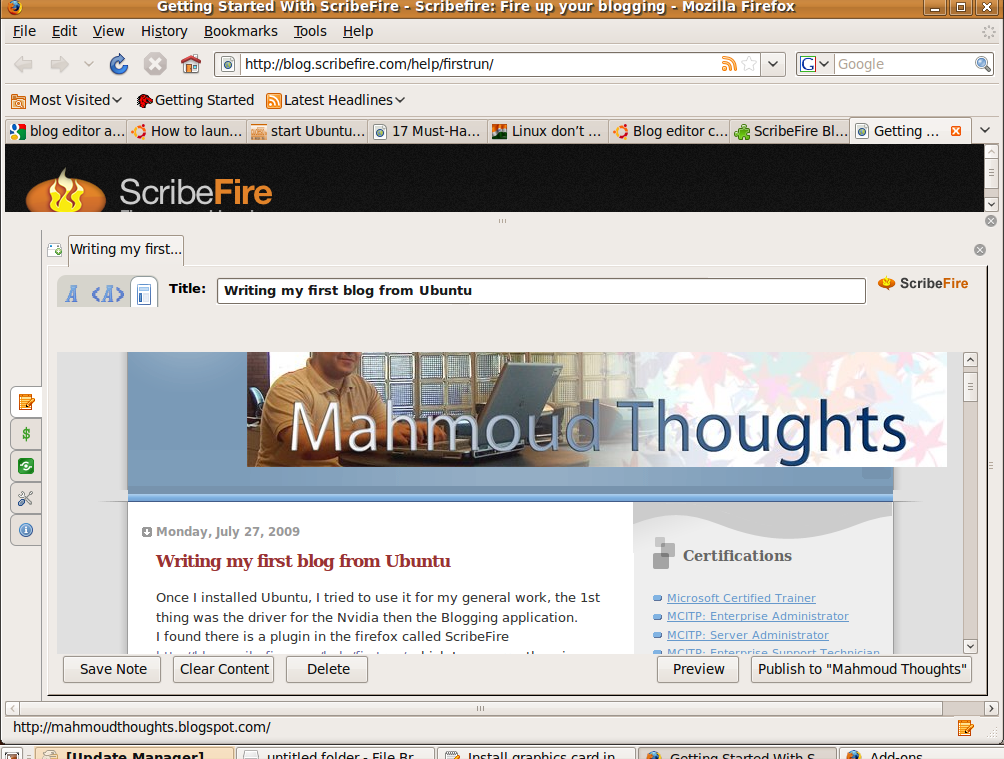
Writing my first blog from Ubuntu
Once I installed Ubuntu, I tried to use it for my general work, the 1st thing was the driver for the Nvidia then the Blogging application.
I found there is a plugin in the firefox called ScribeFire http://blog.scribefire.com/help/firstrun/ which I am currently using now.
It has preview feature which shows the article while you did not publish it.

I found there is a plugin in the firefox called ScribeFire http://blog.scribefire.com/help/firstrun/ which I am currently using now.
It has preview feature which shows the article while you did not publish it.
Sunday, July 26, 2009


Friday, July 24, 2009
Microsoft announces RTM for Windows 7 and Server 2008 R2
With the completion of this development phase, Microsoft is calling on partners to ready products in time for the Windows 7 and Windows Server 2008 R2 worldwide general availability.
Windows 7 will be generally available to customers around the world on October 22, and Windows Server 2008 R2 will be generally available on or before that date.
As always, current Windows Volume License customers, MSDN subscribers and TechNet subscribers will get first customer access, getting Windows 7 on August 6 (MSDN/TechNet) and August 7 (VL), and Windows Server 2008 R2 the second half of August.
Microsoft will make the announcement on its Windows Team Blog and Windows Server Blog. Here's the official release:
Steven Sinofsky, President of the Windows Division, has just announced on the Engineering Windows 7 Blog that Windows 7 has reached the Release to Manufacturing (RTM) milestone.
As I mentioned previously, RTM officially happens only after sign-off occurs. What happens is a build gets designated as a RTM contender after going through significant testing and meeting our quality bar for RTM. Then, it goes though all the validation checks required for RTM including having all languages of that build completed. If all the validation checks have passed – sign-off for RTM can occur. Today after all the validation checks were met, we signed off and declared build 7600.16385 as RTM.
Included in Steven’s blog post is a video of sign-off happening from the "Ship Room." Sign-off consists of representatives from all the teams here at Microsoft who helped build Windows 7 signing-off for RTM.
Also happening very shortly, Microsoft CEO Steve Ballmer will get on stage for his keynote address to the Microsoft field community at MGX in Atlanta. MGX is an internal Microsoft event held every year. This is where we bring in our folks in the field from around the world and talk about selling Microsoft’s latest products. We’re a global company and this event is super important to us. As you can imagine, Windows 7 is a hot topic at this year’s MGX and we’re anxious to hear what Steve has to say, and I will update that here.
Not only is RTM an important milestone for us – it’s also an important milestone for our partners. Today’s release is the result of hard work and collaboration with our partners in the industry to make Windows 7 a success. We delivered Windows 7 with predictable feature set on a predictable timetable that allowed OEMs to focus on value and differentiation for their customers.
Our customers told us what they want (and expect) and we defined those specific experiences and then built features to support them (like HomeGroup and the Windows Taskbar enhancements). Our customers also told us that “fundamentals” on both the hardware and software side was extremely important. Windows 7 today runs great on the broadest array of hardware types ranging from netbooks to the high end gaming machines. We worked closely with OEMs so that their PCs ignite features in Windows 7 to excite their customers.
Of course, today’s release is also the result of the amazing amount of feedback we received from the millions of people who tested Windows 7 – from Beta to RC. We actually had over 10 million people opt-in to the Customer Experience Improvement Program (CEIP). That’s a lot of people opting in to help us make Windows 7 a solid release. Through CEIP, our engineers were guided by customer feedback all the way to RTM. We also have had a great group of beta testers who have dedicated a great deal of their time to testing Windows 7 too. A special thank you goes out to all the people who helped test Windows 7.
I’d also like to give a shout-out to my friends over on the Windows Server Team. Today they are also announcing that Windows Server 2008 R2 has RTM’d. Windows 7 and Windows Server 2008 R2 together can help businesses cut costs and increase productivity. Click here to read their blog post on Windows Server 2008 R2 RTM.
The RTM code will be delivered to our partners within the next few days who will then start preparing to deliver some amazing new products timed to hit at General Availability (GA) of Windows 7. And going forward, I expect to be showcasing MANY of these new products here on The Windows Blog.
We continue to be overwhelmed at the community’s response to Windows 7 and it has been an extremely rewarding experience to witness. We hope the enthusiasm will continue to grow even more as our partners build amazing experiences with their products and Windows 7.


Microsoft Outlook 2010 Features: Create quick steps
If you always doing forwarding using For Your Action or For Your Information FYA FYI in your subject you may create new quick action as in the below images


the subject now appears like FYA and the subject of the message.

Microsoft Outlook 2010 features: Forward to your manager.
very nice feature is to forward emails directly to your manager


Microsoft Office 2010 beta version has been released
From the technology prospective we have now two editions one is x86 and x64.
14.0.4302.1000_Mondo_volume_ship_x64_en-us
14.0.4302.1000_Mondo_volume_ship_x86_en-us

Below you will find the installation interface looks typical like the office 2010.

the installation is done without asking for CD key

It contain everything Visio and Project.

Wednesday, July 22, 2009
iPhone Users Enjoy: A professional GPS navigation software released.

iPhone users can now use turn-by-turn navigation application. Full navigation software and maps are installed on the phone, so there is no need for massive data traffic and expensive data tariffs. Application is available at the App Stores in Europe and North America, but soon it will be available for other markets. We didn’t have opportunity to test it but video preview is available at


http://www.navigon.com/site/int/en/products/navigation_software/iphone
Saturday, July 18, 2009
Installing HP OM Agent on non-default drive
One day you may face a need to install agent on another drive “filespace in Unix based systems” to free up some of the space used by the Agent but keep in mind that the agent itself is not consuming much space but hp products (SPIs and Performance Agent) when being installed it is looking for the HP Software date directory and other certain variables and does not allow you to choose where to install their files.
So I will show in the next few lines how to install the agent on another drive.
to give you an overview of the agent installation.
Agent installation files for Windows and Unix environment contain multiple components (for Windows-based there are multiple .msi files and for Unix-based there are multiple .gz files for these components.) that need to be installed in certain order to ensure the agent will work this process is done through an installation script called opc_inst (in Windows-based the file is named opc_inst.vbs)
- We supposed that we want to install the agent on drive e on windows environment so we may execute the below commands in the installation source files:
cscript.exe opc_inst.vbs -srv YOUROVOSERVER -cert_srv YOUROVOSERVER-inst_dir "E:\program files\HP\HP BTO software" -dd "E:\program files\HP\HP BTO software\data"
- In unix evironment you have to download the agent files and almost you have to change opc_inst file to be executable by using the command below
chmod +x ./opc_inst
then you can execute the command below
opc_inst -srv YOUROVOSERVER -cert_srv YOUROVOSERVER-inst_dir "/var/opt/OV" -dd "/var/opt/OV/data"
Ahmed Douban writes this comment.
Thanks mahmoud
-srv Managment Server Hostname or ip
-Cert_srv Certificate server ip "most cases same as Management Server"
-inst_dir is for Agent installation files binaries
-dd for the data directory... Read More
thanks for the nice subject :)
Friday, July 17, 2009
HP Business Technology Optimization
Dear all my blog readers,
I know it was so long since my last article in this small blog, but this all because I am making a big move in my life, it is something like quit being professional trainer and moving deep into being a full dedicated consultant responsible for managing large projects with large teams and manage different expectations from all sides the vendor , customer and absolutely the company I am working for. I do not want to forget I have also to manage my family in a better way.
Anyway, I do not want to go into my life details.
I just want to say, I am today more into HP BTO business, so expect next articles (like step by step or tips or event products hot news) to be in any products surrounding this area; may be tips in OS level Unix and Linux tips, or may be product installation and supporting.
Again, wish me all luck in doing well in my career and in writing these new articles that aimed to facilitate life for other and to be another free source available on our existing meshed life “the internet”.
Wish you all best of luck.
Mahmoud Ibrahim
A writer at Mahmoud thoughts blog.
Thursday, July 16, 2009
Microsoft Maren: Ana bakteb 3araby bel keyboard el englizy we beyt7awel 3araby begad
مايكروسوفت مرن : أنا في باكتب عربي بالكيبيورد الإنجليزي وبيتحول عربي بجد
http://www.microsoft.com/middleeast/Egypt/CMIC/Maren/
Maren converts Romanized Arabic, i.e Arabic text written through Roman characters, into Arabic script as you type. And hence you as a writer/author will be able to send your thoughts in Arabic-script-Arabic instead of Romanized-Arabic, and your recipients will be able to read your text in Arabic, making things more natural. Moreover, if the text you’re writing is expected to reside on the web, you have much bigger chances to appear on the search results than if it were posted in Romanized-Arabic, just by using Maren.
Wednesday, July 15, 2009

Subscribe to:
Posts (Atom)